Ten re-recorded lessons ready for you to enjoy at your own pace. Once you purchase the course, you will need to wait for the access email to be sent manually to you. Depending on the time of day and your time zone, there may be a few hours between purchase and email. Please type your email address carefully and check your junk folder.
Originally released: 2024. Continued access period: LIFETIME
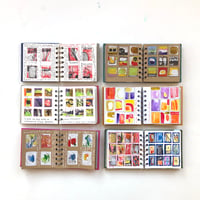
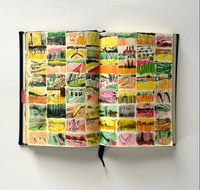
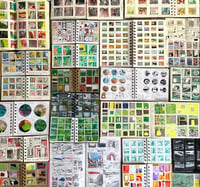
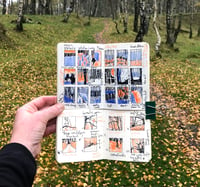
SYLLABUS: each lesson in this enlightening course will focus on a different way to use the thumbnail sketching method (in which drawings are made in pre-drawn frames, arranged in rows and columns across a double-page spread) to benefit observation, expression, and ideation.
We will start by exploring the basic premise of the grid, simply as a system of organisation. One in which similarities, differences, and patterns are easy to spot, where analysis is organic, and progress feels effortless. Whether it is a grid of unembellished colours, pictorial scenes, or bursts of automatic writing, the clarity of consideration that comes with the method is the same: nuance, revealed through repetition and deconstruction, brings about fresh, calm thinking.
Some exercises in this course will focus on investigating and representing the tangible. Using a range of drawing techniques and composition types, we will look at ways of working at different speeds and in different places, both with and without a viewfinder (a tool used to see compositions). Other exercises are about finding ways to record sensory or emotional experiences, utilising the overall structure of the grid to allow time and location to play a part in your visual account (of a journey or soundscape, for example). We will also look at ways to use thumbnail sketching in other processes, such as learning, problem solving, storytelling, and design.
We will work chronologically in one book for the entire fortnight, much as we might during an expedition or retreat. The result will be a sketchbook to treasure, worth more than the sum of its pages.
FORMAT: a new session (ten in total) was uploaded to a course page on my website every weekday during the live run of this course. Each daily session includes a learning objective, topic overview, contextual description, and video tutorial. In addition, two short bonus films, with briefs for weekend activities, were shared on the two Friday afternoons during the run. Content will remain accessible for the "lifetime" of the course. When I eventually observe that the course is no longer being accessed by students, I will email and give you four months notice of its retirement.
MATERIALS:
• Small sketchbook, around the size of a school exercise book. I will be using an A5 book, printed with dot grids, which has 20 leaves (or 40 pages). I envisage filling this book during the course.
• Viewfinder, such as my wooden viewfinder clipboard or bookmark viewfinder (both available in my shop), or you could make your own, in which case you will need a sharp knife and some lightweight card (such as the sort from a teabag or cracker box). I’ll show you how to make a selection at the beginning of the course the beginning of the course. You won’t need a viewfinder for every lesson by the way.
• Ruler, pencil sharpener, a couple of fold-back clips, low-tack masking tape (such as washi tape), double-sided sticky tape and paper glue.
• A selection of drawing media that will enable you to make a variety of marks (broad, fine, translucent, opaque, grainy, smooth, soluble, water resistant, hard, soft, flowing, hazy, solid etc) in a range of colours (some blendable, some fixed) plus black and white.*
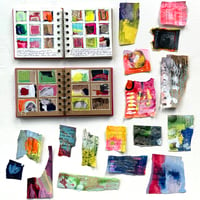
• Printed/found papers suitable for collage.
*I am always loath to compile prescriptive lists of materials that make students go out and buy new stuff, when they could just as well experiment with what the already own. Throughout the course, I will give tips on drawing media, making suggestions for alternatives as I go along. My approach is very much one of experimentation combined with thrift (the principle of using what you already have, can make or find). I am also a tutor that errs on the side of more ideas than less. For example, if I demonstrate with soft pastels, I might also briefly show how the visual effect could be achieved with soft pastel pencils, tactile drawing stones, charcoal, earth (literally, soil from the ground), and even eyeshadow or kitchen condiments. It would be quite ridiculous for me to ask that you acquire all these items for the course.
That said, if you really do have zero drawing media, the following would make a good start: soft graphite pencil and chunky graphite stick (both 2B or softer), stick of charcoal, water soluble coloured pencils and pastel pencils (at least 3 colours of each), black fineliner pens (with fine, medium and broad nibs), and some acrylic markers (at least 2 different colours). Plus something fluid, such as a bottle of ink or some paints (acrylic, gouache, or watercolour would be fine, nothing oil-based though).
CONCESSIONS
The lower price is provided on an honesty box basis for people on a genuinely low income. It is funded via a private grant for widening participation in art education. The discount is not funded by customers paying the full price. Please access it only if you are in actual need.
COPYRIGHT
All content is copyright Tansy Hargan. By signing up for this course you agree not to share, distribute or monetise its content in any way. Videos are not to be replayed in classrooms and studios. If you are a teacher and would like to see me (in person or online) in your school or studio please get in touch [email protected]
